
You’re smack in the middle of the invention process now. You’ve learnt to pick apart and examine the problems, become a Google-fu master, and now you’re ready to crack your knuckles and get into the meat of the work. It’s time to pick up your crayons and construction paper and get to work.
OK, fine, get a pencil and graph paper, if you prefer.
Now, are you ready to doodle?
As always, first things first. Toss off those preconceptions. I don’t want to hear “but I’m not an engineer/draftsman/artist”. It helps to be an engineer because hopefully you learnt all those fancy (and darned useful) equations in school that would make your work go a lot smoother. Draftsmen, from what I understand, are somewhere along the lines of demi-gods when it comes to making a technical drawing. Even an artist can translate thought to drawing, albeit even if in a less than technical way.
Do you need these skills? No. Are they helpful? Oh yes. Keep practising, though, and you’ll be wielding your trusty crayon as a magic sword in no time. For now, though, let’s just plod on.
Doodle what’s on your noodle
Bad puns aside, this is a great way to start. You’ve done your research so you’ve got a few clear ideas of what you want to make, so just sketch them out.
In fact, draw several designs worth. You see, when you have several designs worth of ideas penned out you can visually see different concepts. Here at Insanitek we like to call this visual brainstorming, which admittedly gets out of hand when it’s more or less like pictionary.
Fun fact: If you’ve got a few like minded pals, you can turn this into a social party with potentially lucrative business options later on. We do this once a month at Insanitek over homemade brew and a pot luck dinner.
Refine your ideas
After you’ve got a sketch, it’s time to refine it. Grab some tracing paper, lay it over the top of one of your designs, and start refining the lines. This is where you’re engineering knowledge is going to come in handy. Don’t have any? Don’t worry. You’ll just be spending more time in the research phase than someone that spent 4 years and thousands of dollars getting a degree. You’ll be going through steps 3 – 5 of the research phase a lot while you refine your draft and ideas.
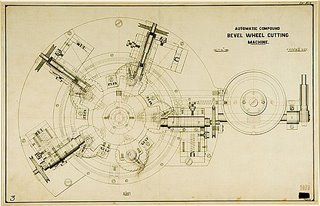
Make your drafts in such a way that they are notes you can follow. For example, take a look at the image below.

You can clearly see a car dashboard with some numbers on it. Your draft might look something like this with notes scribbled here and there with thoughts, ideas, equations, and other tidbits that you’ll find useful while making your mock-up of your masterful creation.
Sound complicated? It is complicated. Inventing something and inventing it right is hard work! That said, you should never, ever be afraid to ask a trusted person for help. Make sure they are trusted as there are a lot of wolves in the inventing world and people will steal your idea if you don’t cover yourself. (We’ll go over that in a later post!) Another option that you can do is scrap what you’ve done and start from a different angle. Maybe your first idea didn’t work and it’s time to start back from the beginning with relooking at the problem with a fresh mind and all that new found engineering knowledge you got from the library.
Hot tip: What you should get at the end of this process is a technical drawing that shows you what you’re making and how it works. It may take you multiple tries of drafting, modeling, testing, and examining your results, but in the end this is what you will have. Buckle in for a long, bumpy (and probably expensive) ride.
Scale it
Once you’ve gone through the gauntlet of refining your ideas, it’s time to move on to the next step: patent drawing 101.
Now, you could go to a professional, like Inventia Patent, that will take your concept drawing and turn it into a bonafide work of patent art ready for the legal gauntlet. However, all professionals like this are expensive. If you’re here, you’re on a budget so you may want to consider the DIY route until you’re sure you want to file your patent.
Hot tip: This scale model should detailed enough that someone can pick it up and know exactly how to build your creation and know what it does.
Your homework
Take your ideas and research you’ve been doing in the previous weeks and work them into a draft. See if you can’t work out a few of the kinks in the theoretical work before you move onto the more expensive experimental work. Next week we’re going to look more in depth with that experimental work and talk about experimental design and how it fits into the whole process.
Previous: Invention Process
Next: Testing limits