Welcome to the first instalment Frugal Fun ─ which takes an assortment of lessons and applies them in a fun, frugal way – with rag wreaths. These posts are designed to take basic lessons and apply them in utilitarian, hands on ways. After all, what’s the point of all these lessons if you don’t know how to apply them?
There is something cheery about wreaths. They can be used in a variety of ways: decorate a room, celebrate a holiday, add seasonal cheer, even to display memories or treasures. And rag wreaths are made with some scrap fabric and a metal hanger. We got our metal hanger from the dry cleaner, and the rags are cut up clothes the kids outgrew and a few scraps from theatre costumes.
Here we show you how to take a rag wreath into a discussion on environmental stewardship, geometry, colour theory, and have fun. It’s also highly likely you have all the things you need at home so this project is seriously frugal.
Skills Practised: Geometry, measuring, cutting, colour theory, nature observation, design, project planning
For the basic wreath you’ll need:
- Scrap fabric in a variety of colours (we use old clothes or cloths with holes in them)
- Ruler
- Crayon or fabric marker (optional)
- Scissors
- Wire hanger
Plan it out (and plug education)
The first thing you’ll want to do is plan the colours you want to make your wreath. This is a great way to talk about the colours you see during the seasons and why. For example, we’re going to be making a fall inspired leaves from the tree we see out the lab window. It’s a good time to talk about why certain trees turn red (pdf from Wisconsin University), while others turn yellow on top of why the deciduous trees lose their leaves every year at all. Really, this depends on where you guys are at in your education.
While picking up old clothes that are stained or have holes in them, it’s a great time to talk about environmental stewardship. Some people naturally understand upcycling and recycling, while others do not. This is a great time to talk about where wastes go, how long it takes for cloth to degrade, and generally trash and environmental stewardship in general. Again, the details of the discussion should be based around the education level you’re currently working at.
Getting crafty
Now that you’ve planned out your colours, grab the ruler and scissors. It’s time to get going.
There are two methods we’ve come up with for the rag strips. We’ll share them here, but we’d like to see if you can come up with any more designs to add dimension to the wreath. One of them is suitable for really young kids, the other for older kids.
Easy method ─ this method is great for elementary school students or those that are not necessarily artistically inclined.
 Cut the fabric strips in a rectangle that is 6″ long by 2″ wide. Logic challenge: Ask the kids to think about how changing the dimensions will change the overall look of the wreath before they cut out more strips. This gives them a chance to reflect on various factors, such as stiffness of the fabric and how the length will impact the look, how hard it will to tie knots with fabric that wide, etc.
 - Lay out the strips in order that you want to tie them on. This helps students learn a basic organising skill. It also helps them reflect on how organisation and efficiency relate without nagging them about the concept.
- Shape the hanger into a circle with the hanger top by pulling the bottom out and pushing the shoulder points in. (Adults will have to help with this.)
- Tie a square on, squish together, repeat.
- Fluff the wreath out by pulling the ends of the squares to point different directions.
- Add other decorations or hang as is.

More complicated method ─ this method is great for middle school students and others that are more artistically inclined.
 Cut the fabric strips in more of a “bow” shape. This can be done with cutting triangles or half circles out of the side of the strip. Though, half circles are easier.
- Lay out the strips in order that you want to tie them on.
- Shape the hanger into a circle with the hanger top by pulling the bottom out and pushing the shoulder points in.
- Tie a square on, squish together, repeat.
- Fluff the wreath out by pulling the ends of the squares to point different directions.
- Add other decorations or hang as is. A good one to practise more design concepts (with math and logic) are fancy pompoms. A great tutorial is mrprintables flower tutorial, but you can make pompoms in ghosts and skull shapes as well.
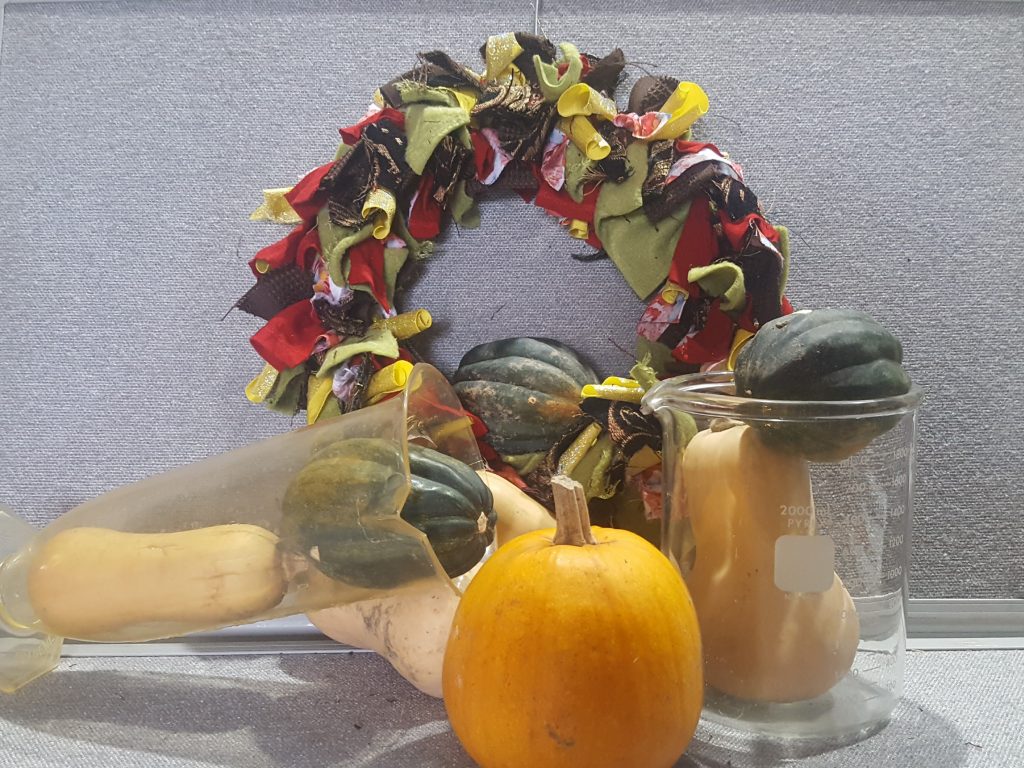
Take it from us. We’ve made a couple of these now, and the one you see in the post here has both the straight rectangles for the thinner, more flexible fabrics. We used the second method on thicker fabrics since they were more difficult to tie with more fabric involved.

Notice how the hanger body is rounded and the top is twisted so it hangs easily. This is pretty much the core of making the hanger usable no matter what colour theme or decorations you choose.
Adding little things to it? Just grab some wire and wrap it around the knots at the wreath.

Have fun with this “experiment,” but don’t forget math and logic appears everywhere. Introspection about colours, environmental stewardship, and art exist along side of these two hard science concepts without a problem. The key is embracing both sides with a grin and lots of giggles.